A quick how-to get data from a EDF Linky using a Wemos D1 ESP32 running Tasmota to feed home assistant energy dashboard.
Linky integration in standard mode with Home Assistant and Tasmota.
In this post, we’ll go through the steps to get energy data from a Linky in standard mode right into Home Assistant through MQTT using Tasmota running on a ESP32 with a Wemos Teleinfo Hat.
1 – Tasmota (Linky side)
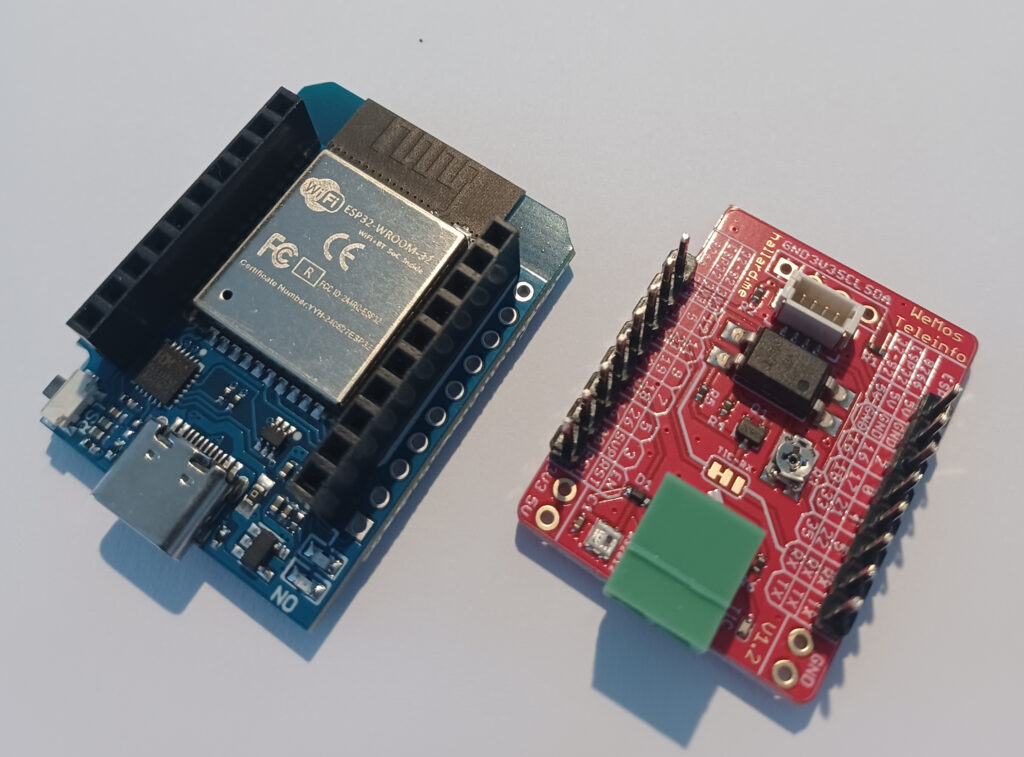
On the linky side, the hardware will be :
– Module WiFi Mini NodeMCU ESP32 D1
– WeMos Teleinfo ESP8266/ESP32/S2/C3/S3 Shield
Get Tasmota files :
git clone https://github.com/arendst/Tasmota.gitCode language: PHP (php)Go to the Tasmota folder
cd TasmotaBefore compiling, let’s enable the support of Teleinfo
vim tasmota/my_user_config.h And uncomment the following line
#define USE_TELEINFO // Add support for Teleinfo via serial RX interface (+5k2 code, +168 RAM + SmartMeter LinkedList Values RAM)Code language: PHP (php)Create a venv environment and source it :
python3 -m venv ./venv
source venv/bin/activate
Install plateformio
pip install platformioThen compile and upload :
platformio run -e tasmota32 --target upload --upload-port /dev/ttyUSB0 Then finish the Tasmota configuration as usual :
- Connect to the Tasmota Wifi
- Go to the 192.168.4.1 IP address
- Setup your Wifi
Then go to Configuration -> Other and set as template the following parameters (don’t forget to tick “Activate”)
{"NAME":"Wemos Teleinfo","GPIO":[1,1,1,1,1,1,1,1,1,1,1,1,1,1,1376,1,1,640,608,5632,1,1,0,1,0,0,0,1,1,1,1,1,1,1,1,1],"FLAG":0,"BASE":1}Code language: JSON / JSON with Comments (json)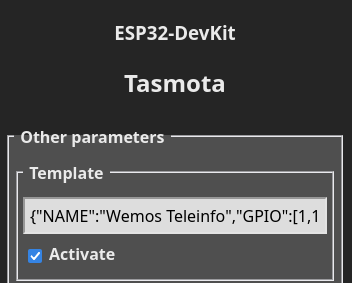
Then the ESP32 will reboot and you should have something like the screenshot below
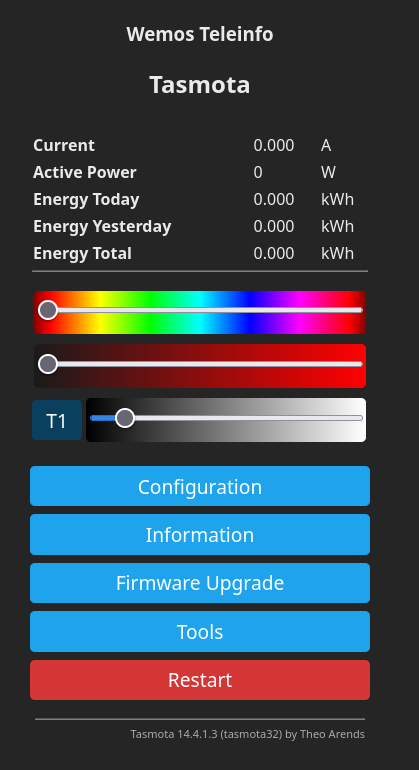
Finally, let’s configure the Linky mode to standard
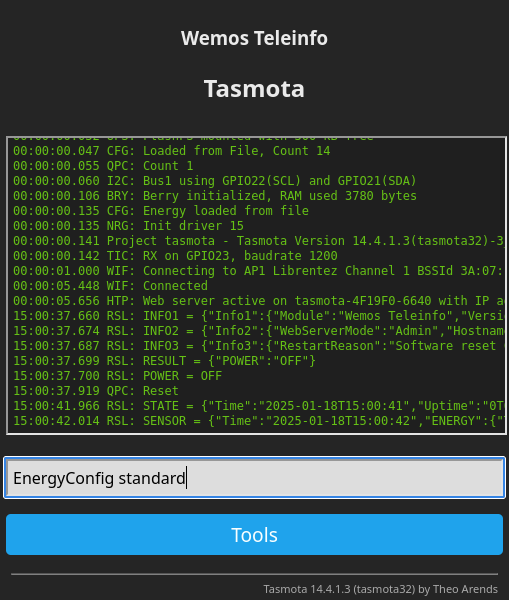
You should have the following feedback
15:02:17.014 CMD: EnergyConfig standard
15:02:17.017 TIC: 'standard' mode
15:02:17.017 TIC: RX on GPIO23, baudrate 9600
15:02:17.019 RSL: RESULT = {"EnergyConfig":"Done"}
Code language: JavaScript (javascript)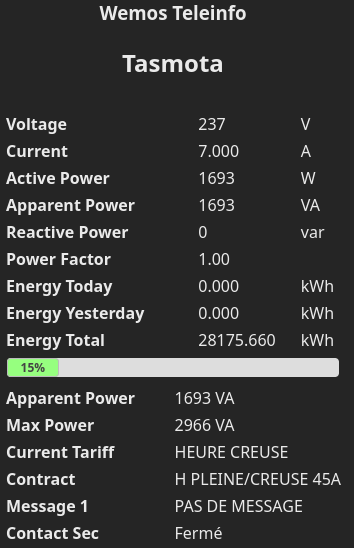
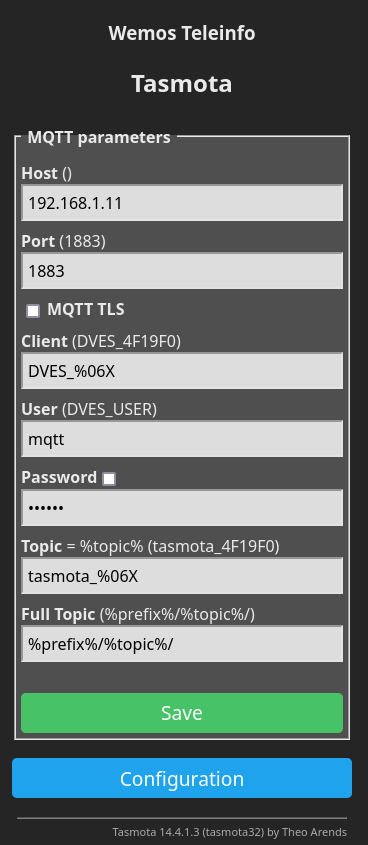
Then I configure the MQTT parameters to push data to the MQTT broker
2 – Home Assistant
2.1 – Simple sensors
Integration in Home Assistant is easy.
Here is an example :
type: entities
entities:
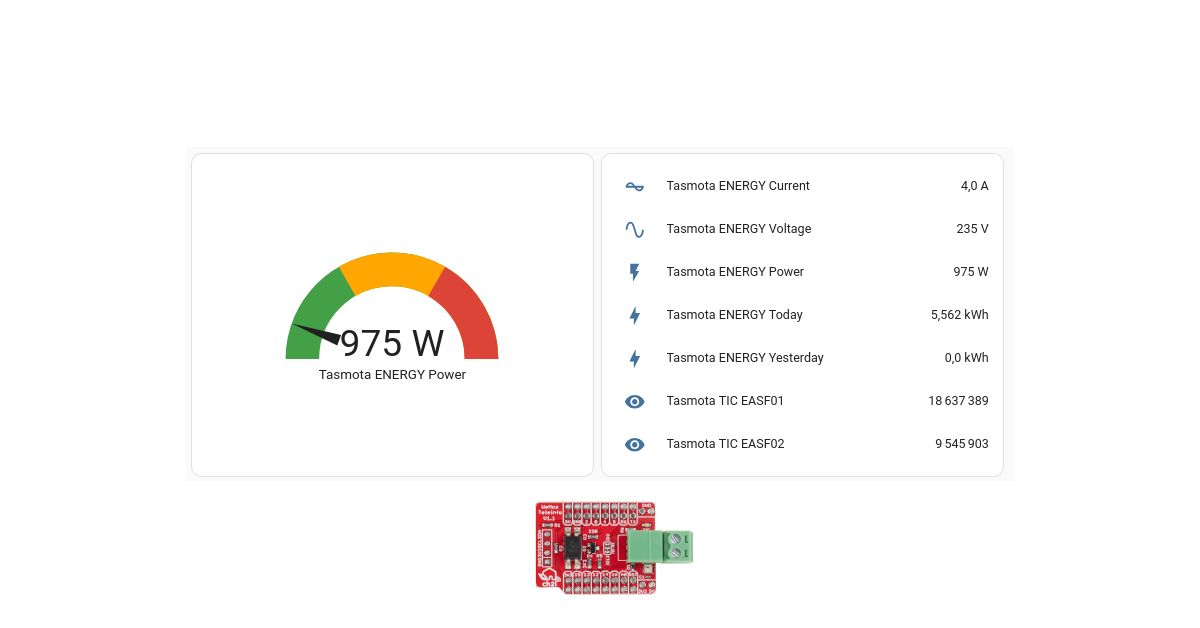
- entity: sensor.tasmota_energy_current
- entity: sensor.tasmota_energy_voltage
- entity: sensor.tasmota_energy_power
- entity: sensor.tasmota_energy_today
- entity: sensor.tasmota_energy_yesterdayCode language: CSS (css)With the following result :

2.1 – Energy dashboard
In order to be able to track cost, we’ll create a template doing a copy of indexes and register them with the right properties (device_class, unit..).
In our configuration we’ll have :
template: !include template.yaml

And in template.yaml we'll have :Code language: HTTP (http)
sensor:
- name: "heure_creuses"
state: "{{ states('sensor.tasmota_tic_easf01') }}"
unit_of_measurement: kWh
device_class: energy
state_class: total_increasing
- name: "heure_pleines"
state: "{{ states('sensor.tasmota_tic_easf02') }}"
unit_of_measurement: kWh
device_class: energy
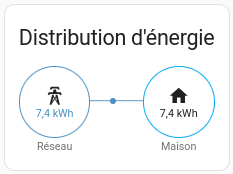
state_class: total_increasingCode language: JavaScript (javascript)Then you should be able to parameter the energy inputs as follow :

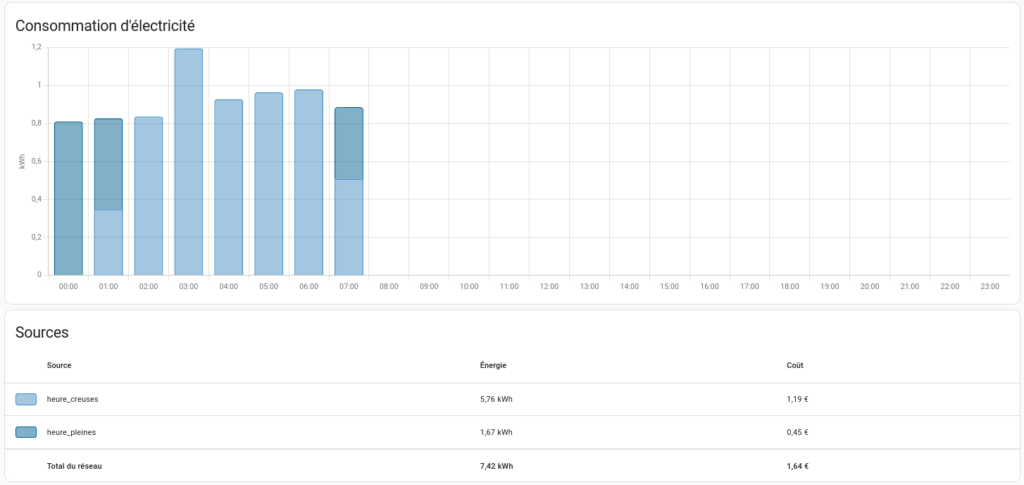
Then you’ll have data displayed.
You’re done : Linky integration in standard mode with Home Assistant and Tasmota.
Related posts
Interested in home automation, you might be interested in Home Automation posts and IT posts.
Leave a Reply